Family Fun: Easy Sugar Cookie Bars Kids Can Decorate for Any Party
Tired of complicated baking projects that leave you with more mess than memories? Imagine a delicious, crowd-pleasing treat that's not only incredibly simple to make but also doubles as a fantastic activity for the whole family. Enter the delightful world of
sugar cookie bars! These soft, chewy, and endlessly customizable dessert bars are a game-changer for busy parents and aspiring bakers alike. They deliver all the beloved flavor of classic sugar cookies without the fuss of rolling, cutting, and shaping, making them the ultimate canvas for kid-friendly decoration at any celebration.
Gone are the days of tedious cookie cutters and sticky flour-dusted countertops. Sugar cookie bars streamline the entire process, turning baking from a chore into a joyous, collaborative adventure. From spontaneous weekend treats to festive holiday gatherings and unforgettable birthday parties, these bars fit seamlessly into any occasion. They're not just a dessert; they're an experience, promising both scrumptious sweetness and cherished moments of creativity with your little ones.
Why Sugar Cookie Bars Are Your New Go-To for Fun (and Flavor!)
When it comes to homemade treats, the appeal of classic sugar cookies is undeniable. However, the traditional process can often be time-consuming, involving chilling dough, meticulous rolling, and delicate cut-outs. This is where
easy sugar cookie bars truly shine. They offer a delightful shortcut, providing all the nostalgic flavor and soft, chewy texture you crave without the extensive prep work. You simply press the dough into a pan, bake, and then unleash your decorating prowess. This no-fuss approach means less time in the kitchen and more quality time with your family.
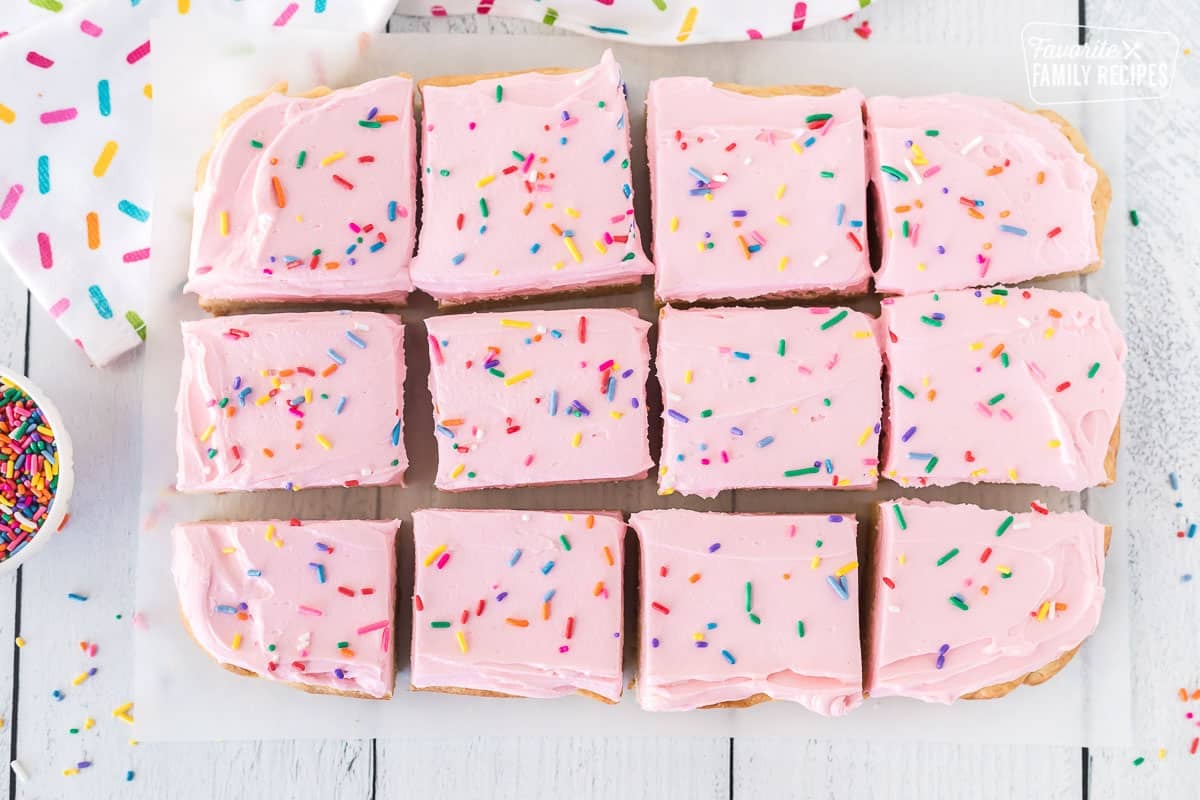
Beyond their inherent simplicity, these dessert bars are a true crowd-pleaser, guaranteed to bring smiles to faces of all ages. Their thick, soft-baked center and slightly crisp edges make for an irresistible bite every time. Whether you’re serving them at a school bake sale, a casual get-together, or a formal party, they’re sure to disappear quickly. Their versatility extends beyond just ease of preparation; they serve as a blank slate for endless creative expressions, adapting perfectly to any theme or holiday. For those who appreciate the convenience and deliciousness of a simple, satisfying treat that bypasses the complexities of their traditional counterparts, it's clear that when comparing these delightful squares to intricate cut-out cookies,
Forget Cut-Outs: These Soft & Chewy Sugar Cookie Bars Are Superior in both ease and enjoyment.
The Magic of Hands-On Decorating: Engaging Kids of All Ages
One of the most exciting aspects of making
sugar cookie bars is the opportunity for kids to get truly hands-on with the decorating. This isn't just about making dessert; it's about fostering creativity, developing fine motor skills, and building confidence in the kitchen. Watching their eyes light up as they transform a plain frosted bar into a vibrant, personalized masterpiece is incredibly rewarding. It’s a wonderful way to channel their energy into a productive and delicious activity, providing instant entertainment and a sense of accomplishment.
Simple Supplies, Endless Creativity
The beauty of decorating sugar cookie bars is that you don't need fancy equipment to create show-stopping results. A few basic supplies and a dash of imagination are all it takes!
- Sprinkles Galore: This is a non-negotiable for most kids! Offer a variety of colorful sprinkles – jimmies, nonpareils, confetti, sanding sugar – in different shapes and colors. You can even find themed sprinkle mixes for specific holidays or events.
- Candy Wonderland: Small candies like M&M's, mini chocolate chips, gummy bears (cut into smaller pieces for younger kids), edible glitter, or even mini marshmallows can add delightful textures and bursts of color.
- Tinted Frosting: Divide your homemade cream cheese frosting into several bowls and add a few drops of food coloring to each. Kids will love choosing their favorite colors to spread.
- Cookie Cutters (for impressions): While you’re skipping the cut-out process for the bars themselves, small cookie cutters can be pressed gently into the soft frosting to create fun shapes, which can then be filled with sprinkles or colored frosting.
- Edible Decorations: Look for edible pearls, sugar flowers, or even small edible eyes for creating whimsical characters on your bars.
Encourage your children to think about the occasion. For a birthday party, they might use bright, celebratory colors. During holidays like Halloween, orange and black sprinkles with candy corn are perfect. For Valentine's Day, think pink, red, and heart-shaped candies. The possibilities are truly limitless, making
sugar cookie bars for kids a year-round favorite.
Tips for a Smooth Decorating Session
To ensure your decorating session is more fun than frantic, a little preparation goes a long way:
- Set Up Stations: Designate a clear workspace for each child, complete with a cooled bar (or a portion of one), a small spatula or butter knife, and individual bowls of frosting and sprinkles/candies. This minimizes squabbles over supplies.
- Aprons are Your Friends: Protect clothing from inevitable frosting mishaps with aprons or old t-shirts.
- Pre-Portion Everything: Before the kids gather, portion out frosting and various decorating elements into small, easily accessible bowls. This prevents spills and ensures everyone gets a fair share.
- Embrace the Mess (Within Reason): Let go of perfection! The most charming bars are often the ones with a child's unique, slightly messy touch. Have a damp cloth or paper towels handy for quick clean-ups.
- Supervise, Don't Dictate: Offer guidance and ideas, but allow children the freedom to express their creativity. The goal is enjoyment, not Instagram-perfect confections.
- Clean Up Together: Involve the kids in the clean-up process to teach responsibility and teamwork.
Crafting the Perfect Sugar Cookie Bar: A Simple Guide
The secret to truly irresistible
sugar cookie bars lies not in complicated techniques, but in understanding a few key principles and quality ingredients. The base for these bars is often adapted from beloved classic sugar cookie recipes, ensuring that next-level deliciousness. The goal is a bar that is thick, soft, and delightfully chewy, providing the perfect foundation for all your creative decorating.
Key Ingredients for Irresistible Bars
The magic of these bars begins with a handful of common pantry staples that come together to create a rich, buttery, and incredibly tender dough.
- Unsalted Butter: Essential for that classic rich flavor and tender crumb. Using unsalted butter allows you to control the exact amount of salt in the recipe.
- Granulated Sugar: Provides sweetness and helps create that wonderful soft texture.
- Eggs & Vanilla Extract: Eggs bind the dough and add richness, while a good quality vanilla extract is crucial for that signature sugar cookie aroma and taste.
- All-Purpose Flour: The structural backbone of the bars.
- Baking Powder & Salt: Baking powder gives the bars their soft lift, and a pinch of salt balances the sweetness, enhancing all the other flavors.
- Cream Cheese Frosting: A dreamy blend of cream cheese, more butter, powdered sugar, and a touch of vanilla creates a smooth, tangy-sweet frosting that complements the sugar cookie base beautifully and holds decorations perfectly.
The process typically involves creaming the butter and sugar until light and fluffy, then incorporating the eggs and vanilla. Finally, the dry ingredients are gently mixed in until *just combined*. This minimal mixing after adding flour is a crucial step to prevent gluten development, ensuring your bars remain wonderfully soft and tender.
Baking to Perfection: Tips and Tricks
Achieving that perfect soft-baked center and chewy texture is easier than you might think with these practical tips:
- Don't Overmix the Dough: As mentioned, this is paramount. Once the flour is added, mix only until no streaks of dry flour remain. Overmixing can lead to tough, dense bars.
- Choose Your Pan Wisely: A metal pan (like a 9x13 inch baking dish) is generally recommended as it conducts heat more evenly, resulting in a consistent bake. If you opt for a glass or ceramic pan, you might need to decrease your oven temperature by 25 degrees Fahrenheit to prevent overbrowning the edges before the center is cooked.
- Line for Easy Release: Always line your pan with parchment paper, leaving an overhang on the sides. This creates "handles" that allow you to easily lift the entire slab of cooled bars out of the pan, making cutting and serving a breeze. A light greasing of the pan before adding parchment also helps it stay in place.
- Press Evenly: Once the dough is in the pan, use your hands or an offset spatula to press it into an even layer. This ensures uniform thickness and consistent baking.
- Mind the Baking Time: Sugar cookie bars bake relatively quickly. Keep a close eye on them; they are done when the edges are lightly golden and the center appears set, though still very soft. A good rule of thumb is to look for a slightly puffed-up appearance and a light golden hue, but avoid dark browning.
- Cool Completely Before Frosting: This step cannot be rushed! Attempting to frost warm bars will result in a melty, messy disaster. Allow the bars to cool completely in the pan on a wire rack before attempting to frost them. This patience will pay off with beautifully smooth frosting.
Following these simple guidelines will ensure your
homemade sugar cookie bars turn out perfectly soft, chewy, and ready for their artistic transformation. For more insights into how effortlessly these come together, check out
Quick & Easy Sugar Cookie Bars: Soft-Baked Perfection Without the Fuss.
Beyond the Party: Versatility and Storage
While these delectable
sugar cookie bars are undoubtedly the star of any party, their appeal extends far beyond special occasions. They are equally perfect as a comforting weeknight treat, a welcome addition to school lunchboxes, or a thoughtful homemade gift for friends and neighbors. Their robust nature makes them easy to transport, and their universal appeal ensures they'll be loved by everyone.
Making Ahead and Storage Solutions
Planning ahead can make your baking experience even smoother. Here’s how to store your sugar cookie bars for optimal freshness:
- Dough Preparation: The unbaked dough can often be made a day or two in advance and stored, tightly covered, in the refrigerator. Allow it to come to room temperature slightly before pressing into the pan for easier handling.
- Baked (Unfrosted) Bars: Once baked and completely cooled, the unfrosted bars can be stored in an airtight container at room temperature for up to 3 days, or in the refrigerator for up to a week.
- Frosted Bars: Due to the cream cheese in the frosting, frosted sugar cookie bars are best stored in an airtight container in the refrigerator for up to 5-7 days. Allow them to come to room temperature for about 15-20 minutes before serving for the best texture and flavor.
- Freezing for Later: Both unfrosted and frosted bars can be frozen! Wrap unfrosted bars tightly in plastic wrap and then foil, freezing for up to 2 months. For frosted bars, flash freeze them on a baking sheet until the frosting is firm, then wrap individually and store in an airtight container in the freezer for up to 1 month. Thaw in the refrigerator or at room temperature.
With these tips, you can always have a batch of delicious
dessert bars ready for unexpected guests, a last-minute craving, or a quick party contribution.
In conclusion,
sugar cookie bars are a true baking revelation – a simple, soft-baked treat that doubles as an exciting family activity. Their ease of preparation, combined with the boundless opportunities for creative decoration, makes them an unbeatable choice for any party or simply a delightful weekend project. So, gather your ingredients, call the kids to the kitchen, and get ready to create not just a delicious dessert, but also lasting memories with these charming and versatile bars. Happy baking and decorating!